Saturday, May 17, 2014

Rollin Rollin Rollin, Keep that Wagon Rollin

It's been a while since I have posted.  With my most recent project, I have been told that I should post it, so here it goes.

We have a wagon that my parents gave us when the kids were young.  We got it out a couple of years ago for the grandson and he loves it.  But, since it is wood construction, the plywood base eventually warped and broke.  Paw Paw has to keep that wagon rollin.  Rather than replace the plywood with new plywood, I used Plexiglass.


This might be the worlds only glass bottom wagon.

Rick


Friday, September 03, 2010

I Spy & Magnify

A monocle magnifying glass works great for many types of close up work.
However, this design requires that you hold it place like this.
As a result, mine tends to pop out at inconvenient times. Also, look at those wrinkles! I have enough wrinkles without making more. They sell head band type magnifying glasses like this.
I had a project where this design would have worked well, but I had an immediate need, so I combined my monocle with a pair of old low power reading glasses. First I put some glue on aluminum foil.
Then I dipped it.
And attached it.
The result looks like this.
Works great.
Rick

Saturday, August 21, 2010

Hummers Only

I have a hummingbird feeder, and this year it has been quickly sucked dry by this non-humingbird and his many friends.I prefer discrimination in this case, and want hummingbirds only. So, using a 2 liter soda bottle and a hot glue gun, I modified the feeder. Since it looked like the larger bird was barely able to balance and tuck their head down to reach the feeder, the basic idea was to slightly obstruct access and make it impossible to balance and reach the feeding hole at the same time.
It appears to work since the the non-hummingbirds have been absent for a week and the food now lasts several days.

Rick

Reduce Reuse Recyle and REPAIR

Perhaps you know of the phrase Reuse, Reuse, Recycle and also the logo image style associated with this phrase.This post is about the 4th R, Repair. In summary, I think that the information wealth easily found with Google combined with a willingness to take something apart that is already broken, makes it easier to repair things yourself compared to a few years ago.

So, the latch on my dishwasher broke.
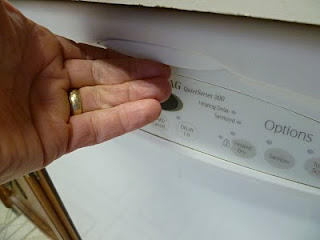
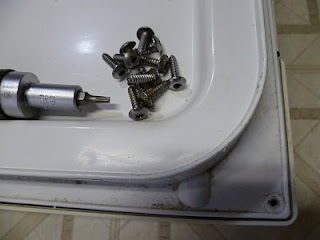
This did not make it completely dysfunctional, just rather awkward. If you pulled firmly enough, it would open. But I got tired of that after a few weeks, so I opened it up to see what I could see. (Hey, its broken anyway.) It needed a "special" driver bit (T-15) visible in this photo, but many driver bit assortments now include this torx bit style. (If you try this at home, be sure to unplug your dishwasher first. Yes, it has a plug, usually under the kitchen sink.)
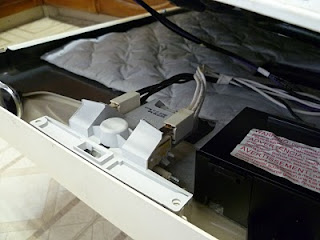
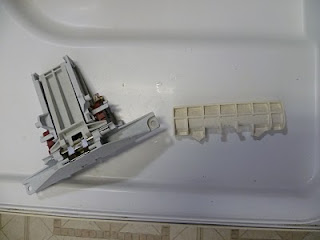
Looking inside, I see a latch assembly with the broken latch component.
A web search using Google and the shopping tab on Google (a.k.a froogle.com) yielded some good information which helped when I called local appliance parts suppliers. I have a preference to use local suppliers but no local supplier had it in stock. (I also learned that local appliance parts supply is a shrinking industry.) Returning to Google shopping I selected a supplier and ordered the part, about $30 delivered. It arrived in one week, and replacing the part was very easy. Since Maytag designed this unit for easy assembly, it also made it easy to repair in this case.

Also, the old part broke at a plastic pivot point.
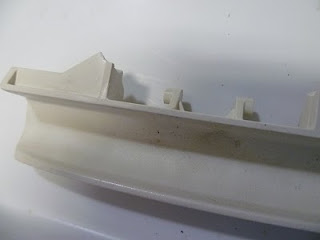
The new assembly uses a metal component at this pivot point, and this suggests that the manufacturer repaired the design, which I appreciate.

So, repair it yourself is the 4th option, but I don't know how to repair the "Reduce, Reuse, Recycle" logo.

Rick

Tuesday, July 27, 2010

Drill Baby Drill

So, I wanted to use my drill driver yesterday, but it has battery problems. I had in-securitized the security screws as previously described. The new batteries had arrived, but I had not installed them. So, now I am motivated.

Here are the old and new parts. The new batteries are NiMH type and have more than double the capacity of the old NiCad type batteries.

I arranged the new batteries to mimic the layout of the old batteries and then soldered bottom tabs. The tabs on the batteries are not oriented exactly as needed for this application, which makes sense since these are used for many applications. As a result, I rotated the cells to create a good enough orientation on the top and bottom.
Top tabs next. This shows how I used a paper clip to hold the tabs as I soldered them.
Then I added the connector to the top battery using a rubber band to hold things during soldering.

I verified the connections with a voltmeter. After this, I smushed the tabs so they would fit better in the case. Even so, some additional smushing was needed to get the case screwed shut. I tested the assembly in the drill.


Success!

Rick

Thursday, July 22, 2010

Too Hot, Too Cold, Just Right

We have a 96 Honda Odyssey van. I keep thinking of selling it. It keeps coming in handy. So now we have a van with more than 198,000 miles. Recently the van was too hot since the A/C stopped working. At 198,000 miles, stuff happens.

I took it in for repair and before the shop could find the root cause, the A/C spontaneously started to work again. Since it is hard to fix something that is not quite broken, the shop asked me to bring it back when it failed again. I agreed with their logic and appreciated their non-random methods.

It soon failed again just prior to when we needed the van and really, really needed the A/C to function. Since it failed on the Thursday before the July 4th holiday, the shop was very busy and not able to look at it until the following week.

We really needed the van, so I went for plan B. They shop had narrowed down the problem and well described what they had already checked, so I knew the A/C thermostat was the likely problem. Using Google, I found the electrical schematic for the A/C system for my van. Using the schematic and a volt meter, I confirmed that this A/C thermostat, located behind the glove compartment, had failed.

I called the local Honda dealer and they did not have the part on hand. So, I opened up the black box (it was not working anyway) as shown.

I was not able to tell what component had failed, so I soldered in a jumper wire (see below) to make the thermostat relay appear as always on.
It worked. We made the trip just fine, but it was too cold, which seems better than too hot.

I ordered and installed the new part this week and it now it is just right!

Rick

Wednesday, July 14, 2010

Security Screws - (In)Security Screws

It is a good thing that battery packs have security screws. Security screws vary, and my drill driver battery pack has this style. The center of the torx screw has a small post.
But I want to replace the batteries on the battery pack for my drill driver. To even order the batteries, I need to verify what I have. I could order a special tool. But I am already special and I don't need a special tool to make me feel special. Enter the Dremel tool with a tiny cutting wheel..
Now I have an (In)security screw.
Repeat 4 times. Now a regular slotted screw driver works very nicely.
So I verified the battery style and quantity and ordered the batteries. I will cover battery replacement in a future post.

Rick