Some of our light switches are in an inconvenient locations. So, at night when we turn these inconveniently located switches off or on, we spend some time in the dark as we stumble our way across the room.
Turns out, they now make motion sensing light switches. They look like this.
I installed two and we love what they do for us. When we walk into these rooms, the lights turn on. After we leave, they turn off automatically after a delay. In the process of getting these installed, I have become unusually knowledgeable about motion sensing switches.
First off, they sell both vacancy sensing and occupancy sensing switches. Occupancy sensing switches activate when you enter and turn off, after a delay, when you leave. Vacancy sensing switches turn on only when you push a button and then turn off, after a delay, when you leave. Product packages clearly state the type, except some may say "manually activated occupancy sensor" which apparently means vacancy sensor or perhaps some scientifically created breed derived from these two switch types.
But wait, there's more. Some work with compact florescence lights (cfl's) and some do not! The product packaging does NOT make this clear. IF the package says "fluorescent magnetic ballast lighting" THEN it will not work with cfl's. I like cfl's. I like them so much I will throw away a perfectly good incandescent bulb and replace it with a cfl. Almost all occupancy sensors sold at retail locations are of this type and they do not work with clf's.
There is a technical reason for this situation and it has to do with how houses get wired. In summary, some wall switch boxes have a neutral wire present and some do not, so stores sell the type that do not need a neutral wire to work.
Occupancy sensors are available that work with cfl's and they always require a neutral wire to operate. It took me some extra steps to find them, so I ordered 5.
Bonus outcome, we are using a little less electricity since we tended to leave these lights on more when we had to turn them on and off the old fashioned way.
Rick
Monday, December 14, 2009
Wednesday, August 26, 2009
Monitor Monitoring
My spouse does a lot of computing and usually has many applications and many windows open at once. Being the household IT person, I set her up with two monitors a couple of years ago using a dual output video card. She did not actually ask for the solution but ended up loving it and using both monitors commonly.
I continued to monitor her use of the dual monitors and found that even two monitors posed a limitation on many occasions. In her work she tends to cut and paste from several applications while also monitoring and replying to email.
Technology marches on and I figured that three monitors should now be possible. My first attempt to plug in a second video card for the third monitor did not work. Some computers can handle two cards, but not this particular computer. After some on-line research, I marched over to my favorite giant electronics store and bought a Diamond USB Disply adapter model BVU195. This small device connects to the computer USB port and a monitor. After installing the device software, it shows up as a third monitor on the computer.
It works great. I note with interest that this device can also be used to add up to six display devices so I will continue to monitor the situation.
Purse Problem Prevented
Saturday, August 22, 2009
Reflecting on the Past
A while back when I had more hair, my son was creating a report on Helen Keller and for that he wanted to trace a picture from the front of a library book. In the past, we had traced pictures by first taping them to a window, but this was a book cover so that would not work. We did not have any tracing paper either.
But I did have a piece of glass in the garage, so using the glass and cereal boxes on our kitchen table, I set up this arrangement.
This second photo helps to show how it works.
I don't recall how the overall report turned out but I thought the picture was great.
But I did have a piece of glass in the garage, so using the glass and cereal boxes on our kitchen table, I set up this arrangement.
This second photo helps to show how it works.
I don't recall how the overall report turned out but I thought the picture was great.
Saturday, August 15, 2009
Old School Tent with Old School Zipper
On the service project last week (See Water Level posting), we slept in tents and some of the youth used an old school canvas tent that we brought along. After the week was over, the youth shared that the neither zipper on the door worked. A problem but apparently it was not a big issue to them and they they lived through it.
So, when packing it away after our return, I checked out the problem. It had the classic failure that we have all see when the zipper slider did not knit together the zipper teeth.
Well, it is an old school tent and perhaps I could get rid of it, but not today. Since this is and old school tent, it had an old school brass zipper. Brass is bendable, so using pliers I tightened up the back part of the sliders. (By the way, you really must to do this trick only when the zipper is moved to the "start" position.)
The back of zipper sliders have a small box-like area where the zipper teeth mesh and exit. If the box is too big, the teeth do not knit together. I applied the same process to both zippers and they now both work. The old school tent lives on to go on another trip someday.
Bonus trick: If you have a zipper with brass teeth that seem to take a lot of pull force to close, sometime candle wax can solve the problem. Lightly rub the wax on the teeth then test by operating the zipper. Don't use birthday candles since the wax is too soft to work well for this purpose.
Fixed a Computer by Removing Software
On several occasions, I have fixed something by taking out parts. This can work with hardware sometimes, and in many cases, I have fixed computers by deleting software.
Two days ago I received a non-functioning computer that a friend asked me to fix. This particular computer has been prone to occasional file corruption anyway, but recently it stopped booting up and got hung partway through the XP start up process.
Since I usually have photos with my blog, here is a boring photo of the computer.
First, I used the free "Avira AntiVir Rescue System" bootable CD to check for viruses and it found some which it then renamed to deactivate them. (http://www.avira.com/en/support/support_downloads.html)
Since the master boot record was trashed, I used an XP install disk in rescue mode to fix the master boot record. Both the fixmbr & fixboot commands were needed in this case. Still in rescue mode, I repaired problem sectors on the disk using the "chkdsk /r" command.
Now it was boot-able but not really fixed since it had crash problems when defragging the hard drive. It turns out that it has some accelerator drivers from Intel that are not really compatible with Windows XP and this was causing read/write issues on the hard drive. Why these were there I don't know.
Solution: Use Add/Remove programs in the control panel to remove the bad software! Now if works great and my friend is happy. I like happy friends.
More Laptops to El Salvador
Level Thinking
Last week I was participating in a service project week with youth from several locations. We were divided into teams on arrival and my team got a project to finish building an awning/grape arbor. The concrete piers had been set the week before, but as we proceeded, it became apparent that the piers had some height variation along the 32 foot run. We wanted to know how much it varied, but we had limited tools.
We did have a large plastic tote and a long garden hose, so we constructed a simple water level. First, at one end of the run we filled the tote with water and immersed the garden hose to remove the air.
Next we pulled one end of the hose over to the the first pier 32 feet away. By moving the hose end up and down we could roughly tell when it was just about even with the level in the tote. We used a pencil to make a mark.
From this we measured a gradual slope of about 6 inches over 32 feet. We decided to let the height change over the run length since it was gradual and it was destined to hold grapes vines anyway. Also the house was not completely level either.
I had these photos taken and I explained to the team that it was for my blog. We got to talk about my blog during the week, we finished the project a bit early and I had a fun week.
Monday, June 15, 2009
Cooking With Gas
My daughter and I were recently preparing a Mother's Day lunch. I had primary responsibility for grilling the Salmon after my daughter created the recipe by combining several recipes from the internet. The grilling was going well, but it did not have the nice grilled finish on top that I was looking to create.
Enter the blowtorch.
That's what I call cooking with gas.
It worked great and everyone loved the result. They also found the process entertaining.
Rick
Enter the blowtorch.
That's what I call cooking with gas.
It worked great and everyone loved the result. They also found the process entertaining.
Rick
Sunday, May 03, 2009
Low Flow Situtation
We rented a big house during the weekend of my sons wedding. It was great and we filled it up with friends and family. A problem developed with toilet. Modern low-flow toilets tend to get plugged up more easily it seems to me.
So we kinda needed this to work again and I could not find a plunger. Since it was flowing a little, I decided to try the following. First, I filled up a trash can with hot water from the shower, then I carefully filled the bowl with this water up to somewhat near the brim. Next, I added a lot of liquid dish soap, maybe about 6 ounces. Then I left it alone. Here is a photo.
About 15 minutes later, I heard a whoosh sound. Problem solved. This may not always work but this time it did.
Rick
Wednesday, April 29, 2009
Suspenseful Story
All the groomsmen, plus the father of the bride and I, the father of the groom, were putting on our tuxedo finery when we had a problem. Understand that we all had clear instruction to wear suspenders. Some asked "Why suspenders?" and the rest of us explained "Because the bride said so." We also added that it makes the slacks straght and flatter. No argument from me since I was in favor of anything that makes me look slimmer.
Back to the problem. The father of the bride had defective suspenders! Gasp!
So I fixed them with a pocket knife.
The metal clasp part was bent over kinda backwards, so I bent it back. Oh, I used my son's old Boyscout pocket knife and the Bestman took this photo with his iPhone.
Rick
Back to the problem. The father of the bride had defective suspenders! Gasp!
So I fixed them with a pocket knife.
The metal clasp part was bent over kinda backwards, so I bent it back. Oh, I used my son's old Boyscout pocket knife and the Bestman took this photo with his iPhone.
Rick
Tuesday, April 14, 2009
Laptops
Fellow Rotarian's arranged for the donation of a quantity (more than 80) of used corporate laptops. None had disk drives or power supplies and there was a mix of models.
I took the project of getting them back to operating condition. It has been quite a project. About half were the same manufacturer and model (Toshiba M2) , so I started with those.
Some have swappable parts and others are hopelessly broken. All the steps to get these working again is a long story that involved a local used computer store, ebay, and a lot of trial and error.
It turns out that there was a way to get these to work again after all and so for I have completed 10. Shown below are units 7 through 10 that I completed just this morning.
Through connections in our Rotary club, we are getting these to El Salvador. Shown below is a scholarship student with one of the earlier laptops that I completed a few months ago.
I set these up with an "English" and "Espanol" user logins. I used OpenOffice 3.0 with a Spanish language pack for word processing and spreadsheets. It automaticaly switchs languages by the login type. I also installed the Spanish version of the Firefox internet browser. They turned out rather well. Time to make more.
Rick
Wednesday, April 08, 2009
Major House Repair - One Option
The house across the street was sold a couple of years ago. It needed a lot of repair. Actually, the house had been moved to the lot from another location about 50 years ago. The house was old when it was moved and it has been maintained but not improved much since.
The new owners liked the location but not the house, so they elected the following repair option.
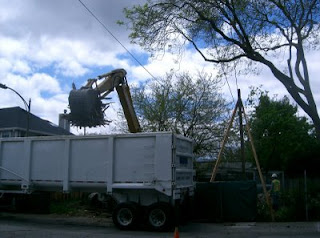
Crunch and dump.
Though old, it was not historic. The new house will meet modern energy efficiency and structural safety codes. At this point, the old house can now be officially called "dumpy" since that is where it is at.
Rick
Tuesday, April 07, 2009
Overheating Engine
This is a post about a project from the past. A year and a half ago, a College Kid (CK1) I know had some engine overheating troubles with his 96 Subaru Outback. It had overheated on the way home from college on Thanksgiving morning.
We did some web research and made some phone calls and determined that it had all the symptoms of a leaky head gasket. It turns out that this is a classic problem for this particular engine from this time period. Specifically, a leaking head gasket allows combustion gas from the cylinders to pass into the cooling system. Air in the cooling system messes up the flow of coolant and the transfer of heat. Result, engine overheating and a slow stream of air bubbles in the coolant reservoir tank. This car had both of these problems so it seemed conclusive.
The bad news it the cost and time of replacing the head gasket. So, I recruited a second college kid (CK2) to help with the project. CK2 LOVES to work on cars and his winter break started earlier than that of CK1.
So, starting on a Tuesday afternoon in December, we pulled the engine.
Doing this involves a lot of steps and tagging of parts so you can put them back where they belong. It also involves getting greasy and problem solving when things don't come apart as easy as expected. This car started out in Vermont so some corrosion from the road salt made it hard to separate the engine from the transmission.
On removing the head gasket, it had this small area with inadequate sealing and you can see evidence of a bad seal and condensed exhaust gasses in the photos below.
That is all it took to fail. Subaru has redesigned this gasket a couple of times since 1996 due to this problem. The old gasket used a combination of metal and fibrous gasket material (a very standard design) and the new gasket used multiple layers of thick and thin metal with sealing compound applied in a detailed pattern at certain edges. The replacement gaskets looked very, very robust.
So working almost daily in the afternoons, we put it all back together and finished on the Tuesday evening a week after we started. The car has not overheated since so it looks like we succeeded and we saved CK1 about $900 by doing this in my driveway. CK2 and I also had fun and we had no leftover parts. Success.
Rick
Tuesday, March 31, 2009
Check Engine Lights
Two weeks ago, while on his way home from school, a college kid (CK) I know called me to ask about his check engine light. He wanted to know if low oil could cause it and should he keep driving. Good questions. I didn't think low oil could be the reason it came on and asked how the car drove. Since the car was driving fine, I suggested he can drive the rest of the way.
The car got CK home and he came by my house so we could check it out. He has a 1996 Subaru wagon so that means that my code reader would work. Since 1996, all cars use a OBD2 code reader interface. (I think OBD means On-Board-Diagnostics.) Mine looks like this and it cost about $70 at my local cars parts store.
I have used it several times and it has more than payed for itself. The hardest part of using this is finding the plug location on the car. So far, it has always been inside the car and somewhere under the dash. Sometimes it is easy to find, sometime it is under a cover, sometimes it is out in the open and sometimes I have to fish around while upside down under the dash. The plug is standard but the plug location is not.
CK's code number translated to misfire on spark plug number one, so he bought some new plugs at Walmert for about $10. By the way, changing plugs on a 96 Subaru is not easy due to the small space between the cylinder heads and the cars frame. On removal, the old plugs had a way out of spec gap, more than .06" instead of the specification of .044". Plug gaps increase over time as the metal wears off and if has a negative effect on spark quality. Here are the old plugs.
They all look about the same, which is good. If one was fouled or very different in appearance, it would suggest the existance of some other issue.
Using the same code reader, we cleared the codes from the cars diagonistic system.
CK took the car on the spring break camping trip the next day and he later reported that the gas milage improved from about 21 to about 25 mpg and that the check engine light did not come back on. The improved milage means that even at $2.25 a gallon, he saved $10 on fuel costs in about 500 miles of driving. Wow.
Subscribe to:
Posts (Atom)